Run Automated Electron App Tests Using Travis CI

Last year I developed the Standup Picker which is an Angular application running in an Electron shell.
As I released new versions while older versions were already in use, I wanted to gain more confidence while releasing newer versions of my application.
As the source code is available at GitHub I researched for free alternatives to Jenkins which we used at work for Continuous Integration (CI).
I found Travis which is a free continuous integration platform for GitHub projects.
My Expectations

I wanted to integrate automated E2E and unit tests before each release of the Electron application. In my case, a release should be triggered if something has been merged to master. So the CI should basically perform these steps:
Run unit tests
Run E2E tests
Create Electron releases for OS X, Linux, Windows
This way I can be pretty sure that my releases work as expected (at least all the stuff that I have covered by tests).
Integrate Travis CI in your project
To be able to use Travis you need to make sure that you have a GitHub account and that you have owner permissions for this project hosted on GitHub.
Next step is to visit the Travis homepage, sign up with GitHub and follow the instructions until you can select your project.
To be able to tell Travis CI what automated steps should be executed you need to add a .travis.yml file to the root directory of your repository.
Finally, you need to add the .travis.yml file to git. If you then commit and push, a Travis CI build is triggered. Be aware that Travis can only run builds on commits which were pushed after the .travis.yml file has been pushed to git.
Configure Travis CI
I will now explain how I configured the .travis.yml file for my Electron application.

Select Operating System
I start with a quote from the electron-builder website which is an NPM package I used to create my Electron releases:
Don’t expect that you can build app for all platforms on one platform.
As I wanted to create releases for OS X, Windows, Linux I had to define multiple operating systems. The main reason was that it is not possible to create a Linux release from OS X or Windows.
So I ended up running my Travis setup on Linux and OS X in parallel. My scripts check the current operating system and run only in the correct environment.
Check the official documentation for more details.
These are the relevant parts of my .travis.yml file:
osx_image: xcode8.4 # define OS X image which will be mounted

dist: trusty # use Ubuntu Trusty for Linux operation system

# Note: if you switch to sudo: false, you'll need to launch chrome with --no-sandbox.
# See https://github.com/travis-ci/travis-ci/issues/8836
sudo: required

# Define Node.js as the programming language as we have a web application
language: node_js
node_js: '8'

addons:
  chrome: stable # Install chrome stable on operating systems

# A list of operating systems which are used for tests
os:
  - linux
  - osx
Electron Builder Configurations
For the electron-builder I added some additional cache and variable configuration based on the official documentation:
env:
  global:
    - ELECTRON_CACHE=$HOME/.cache/electron
    - ELECTRON_BUILDER_CACHE=$HOME/.cache/electron-builder

cache:
  yarn: true
  directories:
    - $HOME/.cache/electron
    - $HOME/.cache/electron-builder
    - $HOME/.npm/_prebuilds

before_cache:
  - if [[ "$TRAVIS_OS_NAME" == "linux" ]]; then rm -rf $HOME/.cache/electron-builder/wine; fi
Define Scripts
Now we define the scripts which should be executed by Travis:
# These commands are executed before the scripts are executed
install:
  # On OS X we first need to install Yarn via Homebrew
  - if [[ "$TRAVIS_OS_NAME" == "osx" ]]; then brew install yarn; fi
  # Install all dependencies listed in your package.json file
  - yarn

script:
  - echo "Unit Tests"
  - if [[ "$TRAVIS_OS_NAME" == "linux" ]]; then xvfb-run yarn test; else yarn test; fi

  - echo "E2E Tests"
  - if [[ "$TRAVIS_OS_NAME" == "linux" ]]; then xvfb-run yarn test:electron; else yarn test:electron; fi

  - echo "Deploy linux version to GitHub"
  - if [[ "$TRAVIS_BRANCH" == "master" ]] && [[ "$TRAVIS_OS_NAME" == "linux" ]]; then yarn release:linux; fi

  - echo "Deploy windows version to GitHub"
  - if [[ "$TRAVIS_BRANCH" == "master" ]] && [[ "$TRAVIS_OS_NAME" == "osx" ]]; then yarn release:win; fi

  - echo "Deploy mac version to GitHub"
  - if [[ "$TRAVIS_BRANCH" == "master" ]] && [[ "$TRAVIS_OS_NAME" == "osx" ]]; then yarn release:mac; fi
Unit & E2E tests
Electron needs a display driver as it is based on Chromium. You are not able to execute any of your tests (and Electron will fail to launch) if Chromium cannot find a display driver. To fix this issue we need to use a virtual display driver like Xvfb.
Xvfb is a virtual framebuffer which enables our tests to run in memory without showing an actual screen.
On Linux, we need to run the NPM test script via xvfb-run yarn <NPM_SCRIPT_NAME> on OS X and Windows Chromium is already correctly configured.
GitHub Release
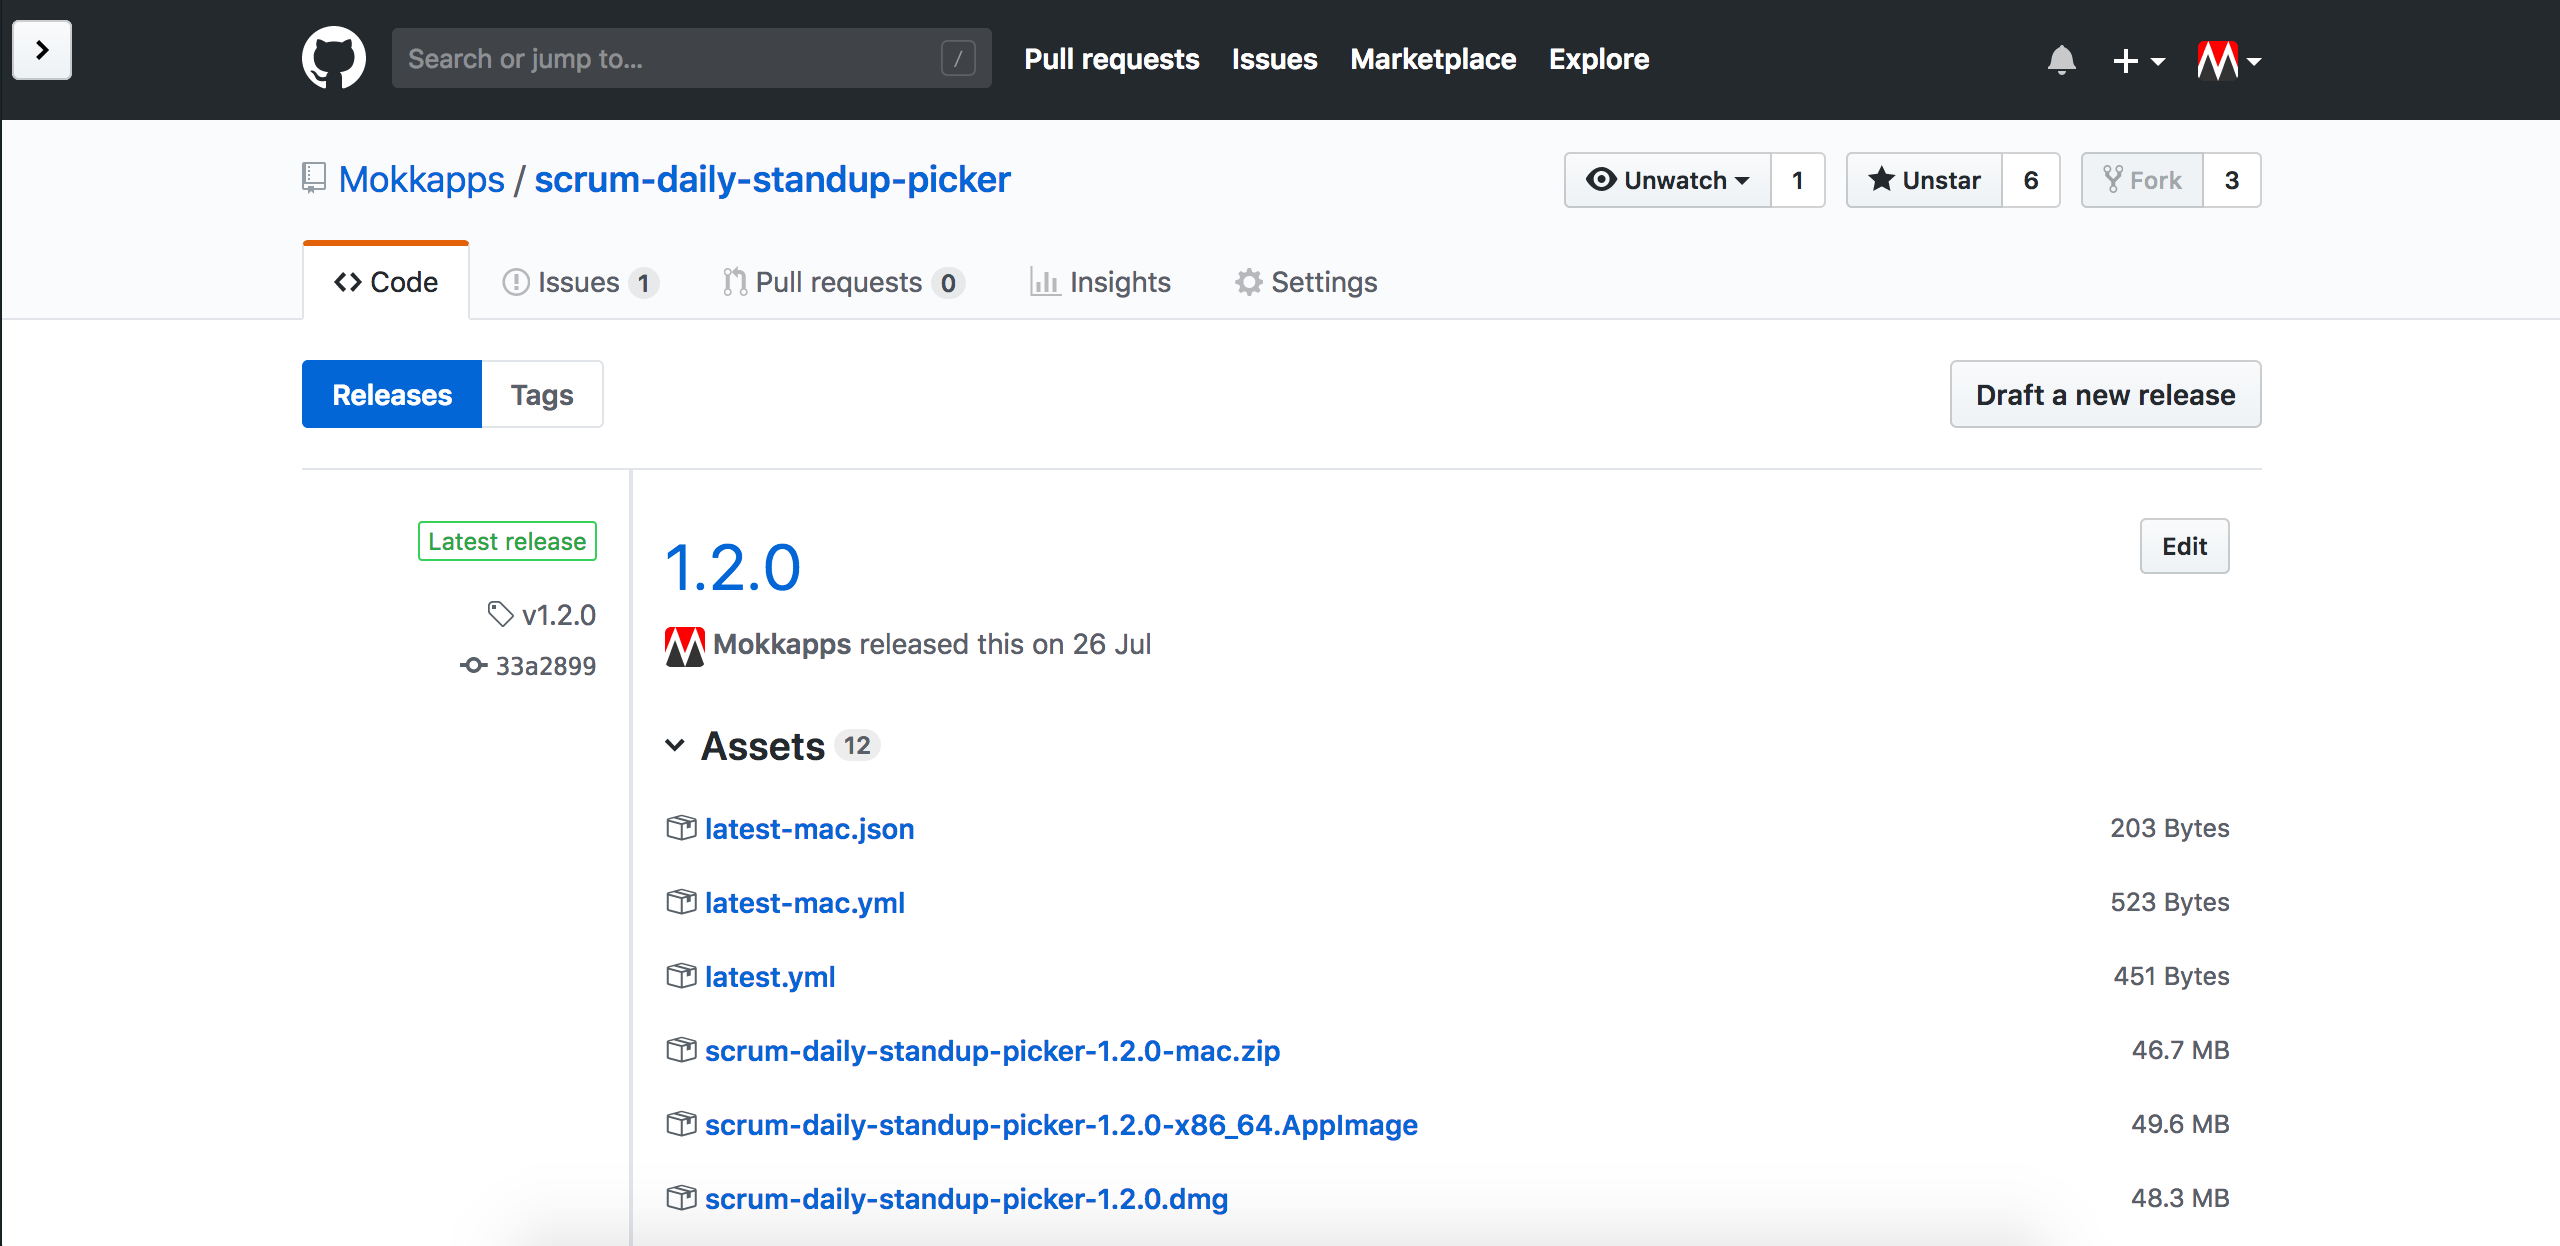
By running yarn release:<OS> from my package.json via electron-builder I could automatically create a new release draft on the GitHub release page if the unit & E2E tests have passed:
Conclusion
I really had to invest multiple hours to configure Travis correctly for my application. In the end, the time effort was worth it.
New releases have passed my tests and I can be sure that the basic functionality of the application is working.
Originally published at www.mokkapps.de.


